Showing posts with label rodinal 1:100. Show all posts

Thursday, October 14, 2021

Using 120 Film in 116 Cameras

I have made quite a few pictures with my 116 cameras using 120 film with only minimal adaptations.  I loaded the 120 film roll into the cameras and rolled it onto the 116 reel, advancing 8 and one half turns to get to the first frame with the ruby window covered.  Two and a half turns between frames gets you five pictures from the 120 roll.  The process is particularly easy with the No. 1A Pocket Kodak because the boxy internal structure holds the feed reel in place with no need to directly engage the end disks of the reel.  Rolling the film onto the big 116 reel leaves the film edges exposed, so it is necessary to use a dark bag to open the camera, remove the reel and load the film onto the processing reel to go into the film developing tank.

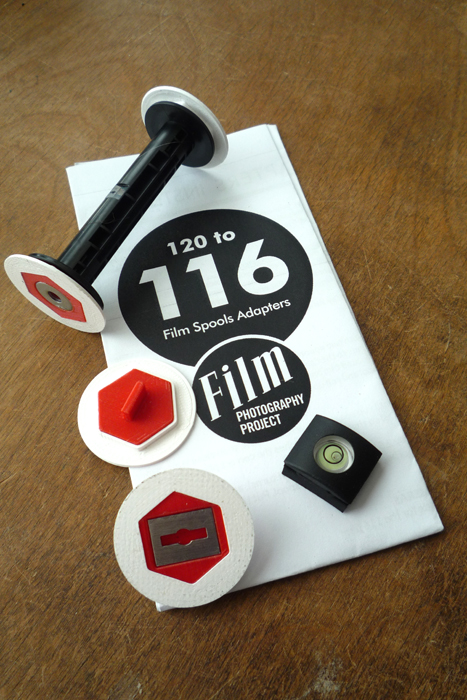
While this simplest procedure mostly works, a few glitches can degrade the results.  The film rolls onto the take-up reel rather loosely and it can drift sideways, causing some misalignment of the image on the film.  An easy fix for that problem is to acquire some 120 to 116 film adapters like the ones sold by the Film Photography Project.

The adapters allow a tight fit of the 120 roll of film into the camera as well as the use of a standard 120 take-up reel.  That solves the problem of film misalignment, and the spacers also produce sufficient tautness on the film to help keep the film flat at the film plane.  The red adapter disks from the kit can be used alone to hold the film reels, but I found it helpful to insert them into the white holders to facilitate positioning the reels in the camera.  The tabs on adapters are a loose fit in the reel slots, so I put a small bit of tape over the tabs to keep them on while inserting them into the camera.

I found the small bubble level on ebay for just a few dollars.  Since the old folders have no accessory holders I just attached the level to the top deck of the camera with a piece of double-sided tape.

I have not seen any problem with film flatness even without a 120 mask for the film plane.  It would be helpful to accurate composition though to make a mask for the viewfinder.

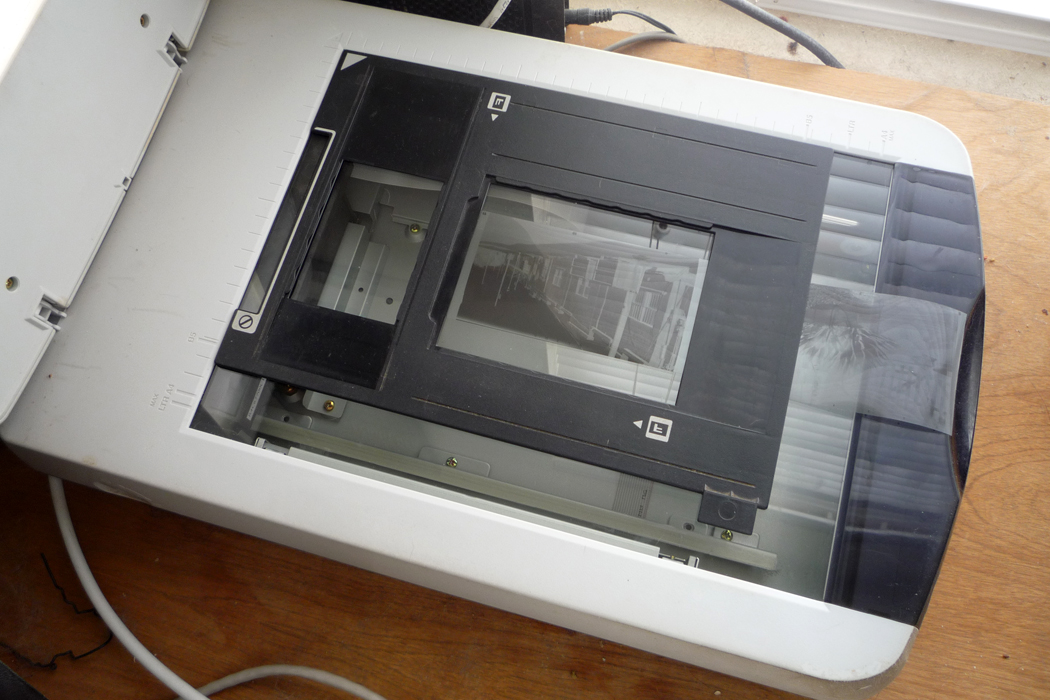
Scanning the long negatives can be a bit of a challenge.  My old Epson Perfection 2450 flatbed scanner has a film holder with a 4x5 frame, so I make use of that to hold the  negatives in place by placing them directly on the scanner's glass and laying the film holder on top of the film.  With the emulsion side of the film toward the glass, the upward curve of the film helps to avoid Newton rings on the scanned images.

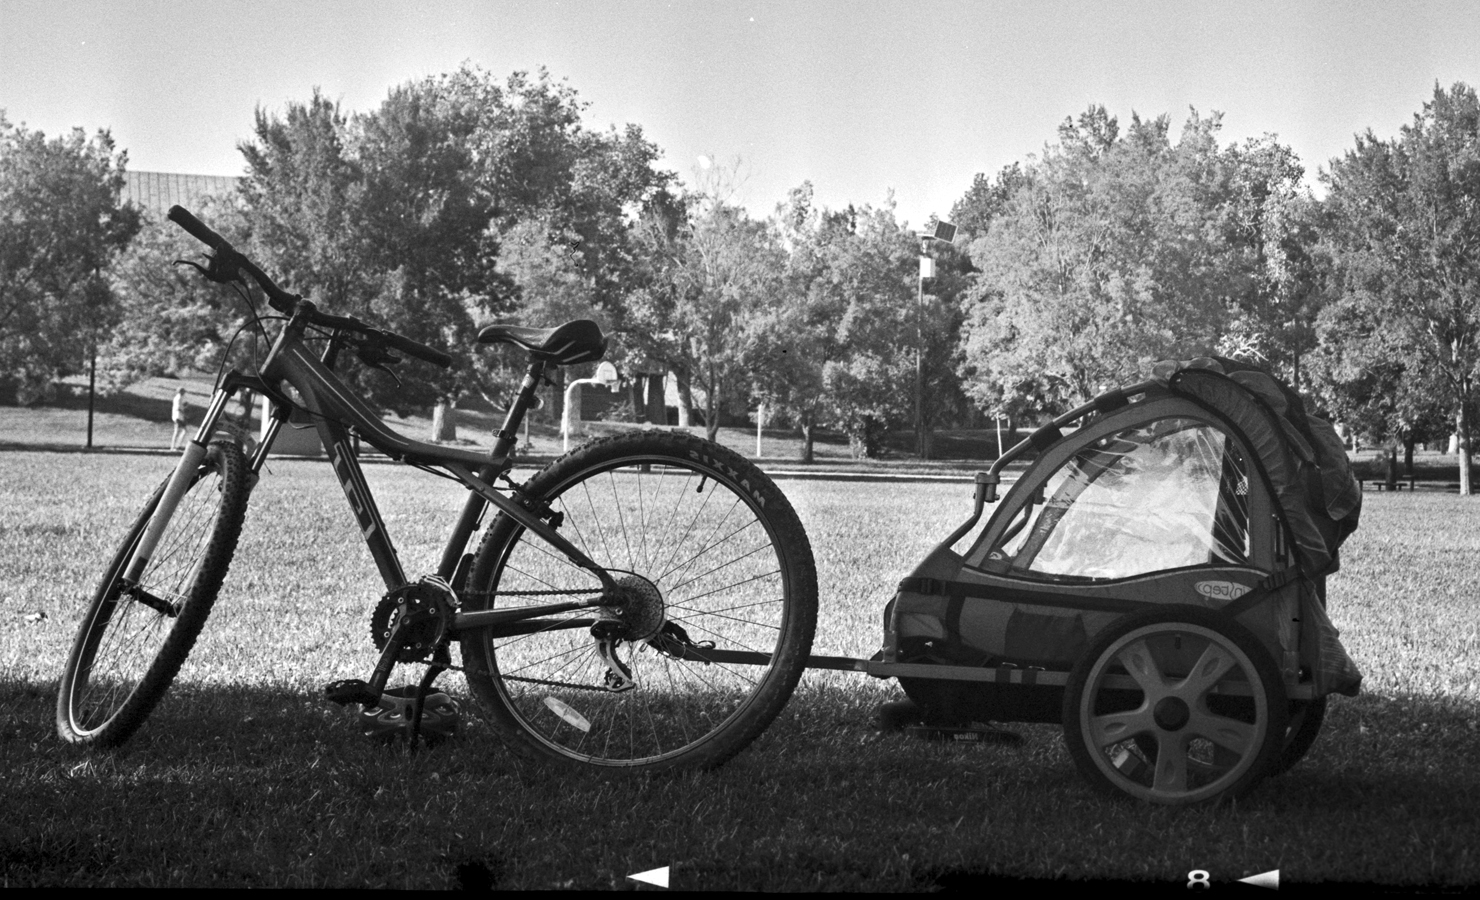
I shot Fomapan 100 in my last outing with the 1A Pocket Kodak using a tripod and cable release to ensure steadiness.  Most exposures were at 1/25, with apertures of f22 or f32.  I developed the film semi-stand in Rodinal 1:100 for one hour.


Wednesday, August 04, 2021

A Walk in the Park

 I shot another roll of expired Tri-X in the No.1A Pocket Kodak on a morning walk through our nearby park.  My main objective was to test a strategy for correctly spacing the frames.  I decided after advancing the film by an initial eight and one half rotations to get to the first exposure I would then give two and one half turns to get to the second frame.  From there the plan was to decrease the film advance by one quarter turn for each subsequent frame with the hope of getting six or more shots on the roll of 120 film.


Well, the first two frames looked just right.  After that the pictures started to run into each other and I ended up with just muddled fragments of images on the rest of the roll.  Not the hoped for outcome, but it was a fun outing in which I learned something, and I thought the bits and pieces still showed some of the nice qualities which the Kodak Anastigmat lens can produce.


In addition to the frame spacing problem, I also ended up having to square up most of the images in Photoshop as a result of grossly tilted horizons.  For that, I'm blaming the use of the tiny reflex finder which seems to aggravate my tendency to misperceive which way is up.  So, for my next outing I'll try using the open frame finder which I usually tape onto the top of my folders, as well as a revised film advance routine.

The one thing I'm pleased to report was not a problem was focal distance estimation.  Snapping pictures under the full Summer sun with a top shutter speed of 1/50 and 400 speed film, the correct aperture setting is f45.  Having consulted a dof calculator before setting out, I knew that the hyperfocal distance for the 127mm lens at that setting was seventeen feet, and that everything from 8.5 feet to infinity would be sharply focused.  For some of the closer shots and with the aperture a stop or two wider the available depth of focus was still well within my margin of error for distance estimation.

Friday, December 18, 2020

P30 Hits a Pothole

 I found a couple rolls of Ferrania P30 in my refrigerator donated by a generous friend.  I decided to give it another go after looking at my first experience with this slow, high-contrast, fine-grain film.  The first time I shot this film was in a camera with which I was unfamiliar; I didn't know what to make of the results.  Taking a second look, I decided the stuff looked promising.  I loaded the film in my 1955 FED 1g, a Leica clone from the Soviet era.


Not far into the roll of film, the advance started getting erratic.  I skipped some frames trying to get past the problem, but it only got worse.  Halfway through the roll the advance locked up.  I called it a day, and went home to process the P30 in Rodinal 1:100, stand development.

There is nothing actually wrong with the 1g.  The issue is the difference in the height of the modern film cartridges from the height of the reloadable cassettes designed for the FED 1g and similar FED and Zorki cameras from the same era.  My solution up to now has been to lay a penny on top of the film cassette to compensate for the lesser height of the modern film cassettes.  As the current experience demonstrates, this is not the ideal solution.

So, I disassembled the camera in order to clean out the chewed up film bits.  I wiggled the advance mechanism a bit to get it turning again and lubricated the advance gear train with some light oil.  That got things working pretty smoothly, so I reassembled the camera and looked for a better way to align the film in the camera.  What I came up with was a plastic washer the same diameter as the film cassette and about the right thickness to to hold the film cassette down to allow the film to travel through the camera without jumping off the sprockets.

I've got one more roll of P30.  I'll load it up in the 1g and try shooting a stop faster to see if I get better highlight and shadow detail.

Sunday, September 27, 2020

Kodak Verichrome Pan

 Verichrome Pan is one of those films a lot of old guys would like to see on the shelves again.  It yielded a rich tonal range and very fine grain that very few modern films can match.  Kodak stopped making VP 120 about twenty-five years ago, but it ages well and there is a pretty good chance of getting some images with it even from a roll that is well expired.  The two rolls I was given recently are definitely in that category; the one that recorded this set of pictures had a use-before-date of Dec. 1973.  I decided to shoot the film in my Kodak No.1 Autographic Special folder that was built around 1917.


All the exposures were at 1/100 and f8 in bright morning sun, two stops wider than the 125 ASA box speed.  The negatives were pretty light, so a stop or two more probably would have been better.  I processed semi-stand for fifty minutes in Rodinal 1:100.


I did a poor job of framing my shots through the open frame viewfinder which I taped to the side of the camera,  so I cropped all the shots to match my intentions.  The uncoated Tessar lens never fails to astound me with its sharpness.

The bellows on my No.1 Special seems fine, but a small light leak has shown up in previous outings with the camera.  This time I ran some black electrical tape all around the back, and that seems to have solved the problem.  Given the fine performance the camera delivered on this last occasion, I think it deserves another go with some fresh film.

Friday, September 04, 2020

The Ricoh 500 Returns !

I bought my Ricoh 500 about fifteen years ago.  Nine years ago I finally got around to shooting a roll of film in the camera.  Another roll went through the Ricoh a year later.  The day before yesterday I retrieved the camera from the back of a drawer and decided it was time to use it again.  A brief inspection showed me that some issues would need to be resolved before I could make more pictures with the Ricoh.

The shutter was sticky below 1/200, apparently because of some congealed grease and dirt on the shutter blades.   Fortunately, it is pretty easy to get at the front of the shutter blades by removing the forward aluminum ring on the lens.  There are three little screws that just need to be loosened, giving access to the front lens group.  Unscrewing the front lens reveals the surface of the shutter blades.


I gently scrubbed the shutter blades with a q-tip soaked in electrical contact cleaner until I could see no more black stains on the surface.  It would have been nice to get at the back of the shutter blades as well, but that would require disassembling the whole lens and shutter.  So, after checking the infinity focus I reassembled everything and, after letting the shutter dry over night,  it seemed to be working fine at all speeds the next morning.


I loaded some film in the camera and discovered that there was one more problem to be resolved.  When I worked the advance lever on the bottom of the camera, the film advanced properly to the next frame, but a second small crank on the lever was needed to get the shutter to cock.  I then removed the back of the camera to examine the advance mechanism to see if there was some way to adjust it so that the film advance and shutter cocking could be accomplished with a single throw of the advance lever.


When the advance lever is cranked, the spring washer in the center of the picture rotates with the raised edge engaging the gear train in the camera body to advance the film by one frame and cock the shutter at the end of the process.  Removing the large screw in the middle of the washer allows removal of the washer which is connected to a toothed gear which rotates as the lever is cranked.  Since it was clear that the gear was just not traveling far enough to complete the process, the obvious thing to try was to reposition the gear slightly.  I did that by very slightly advancing the lever which moved the gear one or two teeth, and I then replaced the washer and gear and tightened down the screw.  That did get the advance working properly with a single throw.

So, time for the real test.  Thanks to the gift of a pile of old film from a friend I had a roll of ten-year-expired Agfa APX 100 to serve as my camera-testing guinea pig.  I managed to expose all 36 frames on a walk into Albuquerque's Old Town, shooting at two stops below box speed to compensate for the film's age.  Back home with the completed roll of film I mixed up a batch of Rodinal at 1:100 dilution and developed the APX 100 semi-stand for forty-five minutes.  I was pleased to see that the camera had worked nearly perfectly, with just a small bit of variation in frame spacing, possibly due to worn teeth on the brass gears.


I cannot make any judgments about the quality of the old APX 100 due to the film's age when I got it; I was just pleased it helped accomplish the job I gave it.  I'm curious, however, about how a fresh roll of the new APX 100 might perform, so maybe I'll try that for my next roll through the Ricoh 500.

I mentioned in my last two posts about the Ricoh 500 that the reason it took me so long to get started using the camera was that I had bought into some allegations about the quality of the Ricomat 4.5cm/f2.8 lens that I had seen on the net.  In fact, it is a very sharp 5-element design, and the Seikosha shutter is accurate and reliable, and one of the quietest leaf shutters I have in my collection.  The design, construction and materials throughout the camera are all first-rate.

In reviewing information about the Ricoh 500 available on the net I came across a 2002 blog post that I believe was the origin of often repeated misjudgments about the quality of the camera's lens.  The  blog author was Karen Nakamura; she was a good writer and a generally good source of information on old film cameras at the time when I was just getting started again with them.  In the case of the Ricoh 500, however, I think she was way off the mark.  Here is what she had to say about the Ricomat lens:

"Unfortunately, while the camera is nice to handle, the optics are clearly from the consumer end of the 1950s, very low in contrast. Nothing to write home about."

and

"The little known successor to the Ricoh 500 is the Ricoh 519. The same camera with a much better 45mm f/1.9 lens. I had never heard of it..."

Looking at the whole blog post, however, those damning judgments are unsupported.  There are no pictures shown from the camera.  There is no indication that the author had shot more than one roll of film before posting her opinions, nor did she apparently examine the camera closely to see if there were any correctible problems with the lens or shutter.  Furthermore, she accepted the idea that the Ricoh 519 had a "much better" lens based on the experience of someone who apparently had no basis for comparing the two cameras.

So, some lessons to take away:

  • A lot of opinions one finds on the web about old film cameras are based on samples of one and are in reference to complex old machines with unknown histories.
  • Ideas get propagated on the web with great ease, be they right or wrong.
  • Bad information on the web has a long life.

Meanwhile, there are a lot of listings on ebay for the Ricoh 500.  Prices are all over the map, but examples of the camera can often be found going for as little as $20.  Take it from me; it's a bargain.

Sunday, February 02, 2020

Nikon F

I picked up this Nikon F recently from Craigslist at a price good enough to where I could justify the purchase just for the plain eyelevel finder which I wanted to use on my F2.


As it turns out, the camera is in mechanically perfect condition sixty years after it was made.  I never thought I would have one, so I'm thrilled at the possibility of actually putting it to use.  I ran a quick test roll of Arista.Edu through the camera to verify my initial impressions.

Margaret has always had amazing hair.

Cate has turned eleven.
More to come.

Thursday, November 14, 2019

More from the Patent Etui

I walked around downtown Wednesday morning and visited the Roadrunner station on 1st St.  I was carrying the KW Patent Etui plate camera with the Tessar lens and loaded with Arista Edu Ultra 400. I was pleased to see in the pictures that I had gotten a bit better in framing my shots with the camera's wire frame viewfinder.  I processed the film with semi-stand development in Rodinal for one hour at 1:100 dilution.


The Rodinal processing gave me tonalities and grain that were not a bad fit with the subject, but I liked my results with this film better with the PMK Pyro developer that I used in my last outing with my other Patent Etui.  I have one more roll of the Arista film and I think I'll try it with HC-110 to see how that compares with the Rodinal and PMK processing.


Thursday, June 14, 2018

macro abstract

A typical photo session for me often encompasses a couple miles of walking along the river.  Limiting my field of view to a table top can offer as many opportunities for finding images, but at a different scale.


These images were all made with the Pentax SP and a +4 accessory lens screwed onto either the 1.4/50 or the 2.8/135.  The TMAX 100 was processed in Rodinal 1:100 semi-stand for an hour.  I liked the results ok, but medium format would likely have given me a little wider spectrum of tones.