Showing posts with label National Museum of Nuclear Science and History. Show all posts

Wednesday, April 26, 2017

Paint

Many of my old cameras have visited the aircraft displays at the National Museum of Nuclear Science and History in Albuquerque.  None of the Cold War Era planes is in flying condition, but the three bombers and the F-16 have recently been repainted and look like new.  Now, the Museum is undertaking a fund raising campaign to pay for repainting the last two planes in the collection, the F-105D Thunderchief and the A-7 Corsair II.  The INDIEGOGO page on the restoration project features an excellent presentation about the history of the two aircraft.

My pinhole picture of the F-105D was in a recent photo show at the museum, and the print was donated for sale by  the museum.


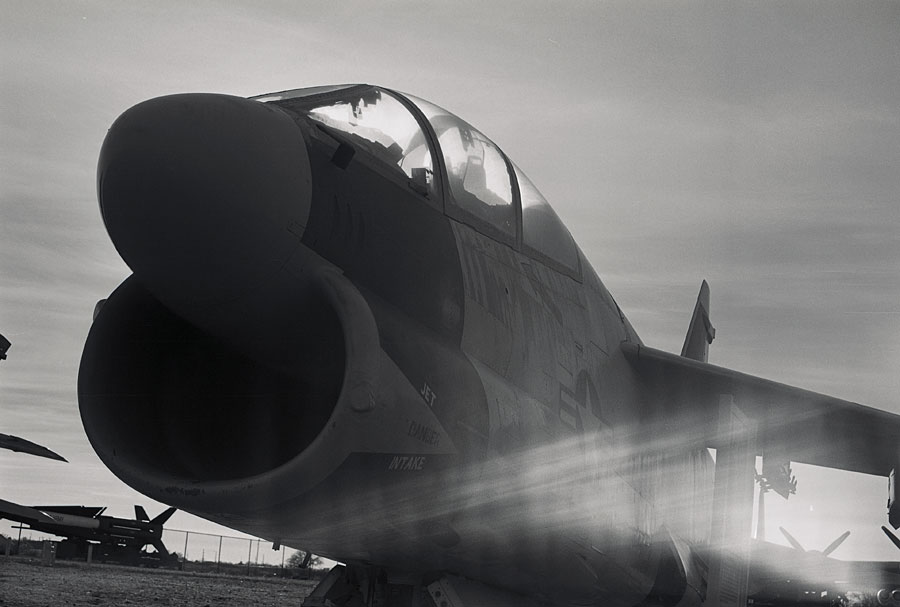
The picture I did of the A-7 Cosair II is one of my favorite shots from my Argus C3.

Monday, August 22, 2016

Kodak Monitor Six-20

I don't know if the Kodak designers had the old iron-clad fighting ship in mind when they named their camera The Monitor. There does seem to be something of a family resemblance in the boxy lines and metal top deck. Still, it is a handsome camera and somewhat better built than its predecessors. Like most of the other Kodak mid-century cameras, my Monitor was made to take 620 film, and it yields a 6cm by 9cm image.

The lens on my Monitor is the 101mm f/4.5 Anastigmat Special; it is front-focusing, with four elements in three groups. The shutter is the No. 1 Supermatic with speeds from 1 sec. to 1/400 sec. and B. I have the same lens and shutter combination on my Vigilant, so much of these notes also apply to that camera. The main difference from the Vigilant is the metal top plate which houses a film advance and double-exposure prevention mechanism. There is also a pretty little dial-type Depth of Focus scale similar to those found on the Retina I. My Monitor arrived with a new-looking and light-tight bellows, but I think that is rather unusual.

Servicing the lens and shutter is relatively easy on the Monitor. Removing the front lens requires that the little post that stops the focus travel be screwed out. Then, you just unscrew the lens and focus scale; be sure to note the point at which it comes loose so you can get it started right when you go to put it back in.
    The next step is a little trickier. The rim of the central lens group projects only a small lip above the surface. This kind of thin-walled brass housing is easily deformed, so it is important to keep pliers and other dangerous tools well away from it. A good tool for getting a grip on the rim of the center lens mount is one of the Flexiclamp wrenches sold by Micro-Tools. I used a 1 3/16" size. Before you start unscrewing the center group, it is a good idea to make a mark crossing the rim to the body so that you can put it back without over-tightening. Also, you will want to note that the group housing comes loose in about one full turn. A friction tool made from a dowel and a piece of rubber will also work.
    Once the center lens is out, you can lift off the face of the shutter and get easy access to the internal levers and gears for cleaning with something like Ronsonol lighter fluid. I also removed the back lens group with a lens spanner so as to not get debris on the lens. The whole thing should go back together pretty easily.

With the lens and shutter clean and reassembled, you are ready to shoot pictures, as long as you are comfortable with re-spooling 120 film onto a 620 metal reel. The Kodak engineers went to some trouble to design a camera that will not permit the use of film on a modern 120 spool.  I experimented with using trimmed 120 reels in a film carrier from an old Agfa folder, but am happier just re-rolling 120 to 620.  There is also a version of the camera which was built for 616 film.

The Monitor user manual advises that the film initially be advanced until the number "1" is just visible in the red window. You are then supposed to move the little lever from "wind" to "1-8" and slightly turn the advance knob which activates the double exposure prevention and moves the "1" into the center of the film frame window. From there you can just crank the knob until it stops without opening the red window for positioning each frame. I initially had some problems with frame spacing but taking off the top, cleaning the mechanism and adding a little lubricant got things straightened out.

The Monitor's sleekly modern design and the nice eye-level finder will propel the user toward camera technique appropriate to a more compact camera. However, that is probably a mistake as the long 101mm lens really demands a thoughtful approach suitable for any of the older medium-format folders. A tripod and a cable release will enhance the chances of success with this camera. It is also important to ignore that pretty depth-of-field dial on the top deck as it is completely inaccurate; hard to imagine what Kodak's engineers were thinking with that feature. Luckily, there are a number of good depth-of-field table gnerators available on the web including a particularly nice one at johnhendry.com.

Below are some images from the Monitor Six-20 shot at The National Museum of Nuclear Science and History in Albuquerque:


And one from the War Eagles Air Museum at Santa Teresa:


A manual for the Monitor Six-20 and Six-16 models is available on line at the Butkus site.

Saturday, August 13, 2016

Kodak Brownie Flash Six-20

Kodak Brownie Flash Six-20
I found this Flash Six-20 at a yard sale a couple years ago.  It was missing the carrying strap, but otherwise seemed in shootable condition.  When I got the camera home, however, I found that there was a small misalignment in the metal case which made it very hard to reassemble after loading film.  I put it aside, and only got around to looking at it again recently when I was planning a visit to a car show at the National Museum of Nuclear Science and History.  Some determined jiggling of the parts showed that the camera could be used, so I rerolled some TMAX 120 onto the 620 spool.  The camera has only two adjustments: a choice of Instant or Bulb for the shutter setting, and focus settings of "5 to 10 Feet" and "Beyond 10 Feet".  The curved back film plane compensates pretty well for the limitations of the simple meniscus lens, though there is a little darkness in the corners of the images.

The car show consisted of many fine examples of the Ford Model T belonging to the members of the Albuquerque Model T club.  They parked them first in front of the Museum's B-29 and then drove them over in front of the B-52 for some additional photo ops.


I thought this little panel truck was particularly interesting.


Saturday, November 15, 2014

Kodak Bantam RF

I recently acquired a Kodak Bantam for a ridiculously low price on ebay.


Mine looks pretty much like new, and everything works more or less as it should.  Aside from the Bantam name and the 828 film format the RF model had almost nothing in common with the  Bantam strut folders which first appeared in the mid-1930s.  Kodak continued producing the 828 folders for a few years after WWII; the name was then passed on to a new line of fixed lens, bakelite-bodied cameras designed by Arthur H. Crapsey.


The Bantam RF design and the supporting Kodak publicity reflected and helped define the '50s aesthetic.


As I had done with my Flash Bantam, I covered the ruby window on the back of the camera and taped a 24-exposure strip of 35mm film onto the 828 reels.  One nice innovation in the RF model is a roller-based frame spacing mechanism which eliminates the guess-work in advancing the film by counting turns.  The removable back presented a bit of a challenge in the process of film loading inside a dark bag, but I think it will be less of a problem with subsequent rolls.  I exposed the first roll of film through the camera at one of my regular test sites, the National Museum of Nuclear Science and History.

F-16 - new paint job and accessories

USS James K. Polk Submarine Sail - surfaced

B-52B Stratofortress

Monday, July 14, 2014

A couple cars and a diagnosis

My compact Olympus XA often gets to ride along in a pocket when I'm out for a walk with no particular photographic objective in mind.  The 1938 Chevrolet was parked at the west end of the Plaza Vieja early on Friday morning.  The owner was sitting on a nearby bench; he said he had owned the car for about 35 years.  


The XA also often gets to go along as a backup when I'm out to make pictures with one of my big 6x9 folders like the Monitor which only have a capacity of eight frames per roll of 120 film.  The XA also allows me to shoot easily in low light environments without the need for a tripod which is really essential with the long-lensed Monitor.  The spiffy sports car was in the shop where Saturday's car show was held.  I'm guessing it is a Ferrari 328, but I could be wrong.


The XA had also accompanied the Monitor when I visited the Nuclear History Museum earlier in the week.


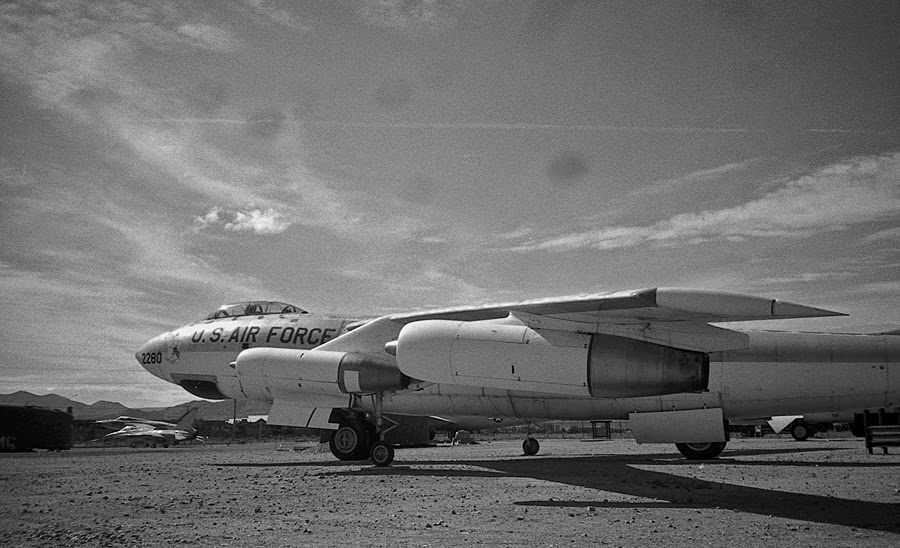
When I scanned the aircraft shots, which had a lot of sky in the background, I noticed that the upper third of the image contained a number of round dark spots which can be seen clearly in the B-47 image.  The spots were present and in the same position in all the images shot that day.  This was clearly something going on in the lens.  The XA shutter has no bulb function to allow keeping the shutter open, so I was only able to examine the front and rear elements and found no trace of anything that could have caused the spotting

I was relieved to find that images made before and after the Museum visit did not have the spots on the negatives.  My fear when I had first noticed them in the aircraft pictures was that fungus had invaded the lens.  In fact my first XA was a victim of such an infection, and there is no easy way to correct that issue in the XA outside of an Olympus repair facility.  My conclusion at this point is that the spots were the result of condensation on the inner lens surfaces, which evidently dried up after the session with the aircraft.

Friday, July 04, 2014

F-16

The Nuclear History Museum has added an F-16 to its aircraft collection. 


It seemed a good excuse to exercise my Kodak Monitor 620.  I had neglected the camera for some time and decided that it was time to rectify that.  I adjusted the infinity focus on the camera, and I restored the 620 film carrier which I had previously removed in an ill-conceived effort to force it to use 120 film.  


It is hard to believe that the F-16 is already a forty-year-old design.  Maybe it's just me.


wikipedia

Saturday, November 30, 2013

B-47

The Nuclear Museum in Albuquerque has recently added a B-47 to its outdoor exhibit space.  The aircraft was the first U.S. operational jet bomber.  It was very close in length and wingspan to the WWII B-29, but the performance capabilities provided by the jet engines were truly revolutionary.


Specifications (B-29)
First flight: 21 Sept. 1942
Crew: 11
Length: 99 ft
Wingspan: 141 ft 3 in
Maximum speed: 357 mph
Rate of climb: 900 ft/min
Specifications (B-47E)
First flight: 7 Dec. 1947
Crew: 3
Length: 107 ft
Wingspan: 116
Maximum speed: 607 mph
Rate of climb: 4,660 ft/min


Wikipedia has very thorough articles on both the B-29 and the B-47.

Sunday, December 02, 2012

Compact History

When I went to the Nuclear Museum to put a test roll through my Patent Etui plate camera I also carried along my Olympus Infinity Stylus loaded with Fuji 200 color.  Besides affording the opportunity to explore the subject with the perspective of a 35mm lens, the little Olympus also provided the chance to experience a large part of the history of compact film cameras from the Twentieth Century.


The first model of the Patent Etui emerged from the KW Stuttgart factory about 1920.  The Infinity Stylus made its debut in 1990.  Both cameras were responses to interest in compactness and ease of use, and both were at the leading edge in their respective eras of technology and design.  
  The Olympus has auto-exposure and auto-focusing and requires nothing of the user beyond composition in the viewfinder and a press of the shutter button.  While the KW camera requires manual setting of focus and exposure settings, the Compur shutter is rugged, accurate and reliable.  The four-element Tessar lens in the folder will still hold its own against modern lenses in terms of resolution, lacking only the anti-reflective coating which came along in the post-war years.   Snapshot-sized prints from the two cameras would be hard to distinguish, though the 6x9 negative from the folder will support vastly greater enlargement than that from any 35mm camera.


Saturday, December 01, 2012

Moving along with the Patent Etui

I took the Patent Etui to the Nuclear Museum after doing a little more work on it.


I cleaned the lens again, replaced a missing light seal at the hinge in the film holder and smoothed out the film path a little to avoid film scratches.


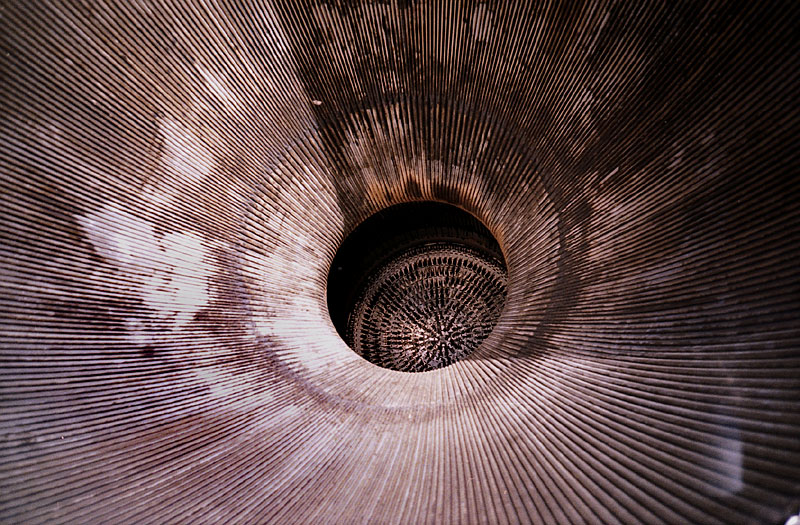
The Tessar lens is really a great performer.  Combined with the 6x9 negative size it is capable of producing some great results.  Below is a crop of the rocket nozzle at 100% enlargement.


All the shots suffered to varying degrees from a couple remaining light leaks.  I'm pretty sure the bellows is leak-free at this point, but the camera body and the film back still need some work on the light seals.


Like the Rada that I use with the Recomar 18, the Rollex film back has a removable internal frame for mounting the roll film and the take-up spool.


Because of the way the film back is constructed, the film feeds onto the take-up spool against the existing curl of the film.  That means that when you remove the roll from the holder, the film and the paper backing spring outward and unroll.  So, it is a good idea to perform that operation inside your light-tight film changing bag.  Because the Rollex is a bit rougher in its design than the Rada, I think it is going to be a little more difficult to get it leak-proofed.  It is unfortunate that sheet film is no longer available in this size as I think the use of a sheet film holder would be a help in diagnosing problems.

Saturday, November 05, 2011

Voigtländer Vito II

The Vito II is a gem of a camera, and one of my great favorites.


I found two Vito II cameras one night on ebay; I won the bids on both at $15 each. Both cameras were in excellent condition with Compur-Rapid shutters, but one lacked an integral take-up spool and a rewind knob. I took the needed parts from an older model I had with a slower Prontor shutter.

Saturday, October 23, 2010

pinhole


I was honored to have a selection of my pinhole work included in the Pinhole Days exhibit at the 591 Photography Blog.

Sunday, November 01, 2009

vintage aircraft with a vintage camera

The B-52 and the B-29 at The National Museum of Nuclear Science & History in Albuquerque.


I've photographed these old planes many times; this is the first time with my centenarian Kodak, the 1-A Special with the Rapid Rectilinear lens. It is always fun to get nice images from very old cameras, but on this occasion the camera also represented a practical choice given the subject. The long lens provides a nice perspective, and the semi-panoramic format is well suited to these big bombers. The exposures were 1/50 sec. at f45 on Fuji Neopan 400.