Pages

Tuesday, December 29, 2009

The Critics


The backyard cats were a little irritated with me for fooling around with the camera instead of filling the feed bowls.

The camera was the Olympus Infinity Hi-Lite AF, aka: AF-10 Mini.
The lens is an f4.5/35mm; it focuses down to one meter and is a little soft at wide apertures, but does pretty well in bright light. The camera, introduced in 1994, has the great virtue of using cheap and easily obtained AA batteries. Another two-dollar find at the thrift store.


Tuesday, December 22, 2009

Caponigro

A place I look to everyday for inspiration is the Lens blog at the NY Times.


Last Friday's offering was an article by Niko Koppel about a handmade book by Lumiere Press, with a gallery of photos by Paul Caponigro from the book. The article is a real education in the art of handmade books and, of course, Caponigro's work is extraordinary. The images have an abstract ambiguity similar to that found in optical illusions, but the mind-flip is not one of simple perspective, but rather a jump from one existential level to another -- from an apple to the cosmos.

Sunday, December 20, 2009

battle ready


The al-Barran Chapter of the Society for Creative Anachronism was out in force for their weekly martial practice at Bataan Park in Albuquerque. They seemed to be having a lot of fun whacking each other.

I was on my way somewhere else when I spotted the group and only had my Ikonta 520 with me -- not my first choice for war photography. I'll try to get back sometime soon with more suitable equipment.

Friday, December 18, 2009

Old Town Albuquerque


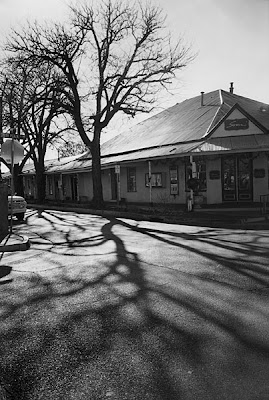
I found another mju point-and-shoot, this one at a thrift store on the other side of the Sandia Mountains. It has no light leaks, and seems to be operating perfectly. Millions of this model were made by Olympus; when they first appeared in 1991, the cost was $130. My cost was five bucks. It seems like such a bargain given the level of design sophistication in this camera.

Wednesday, December 16, 2009

perpetual motion


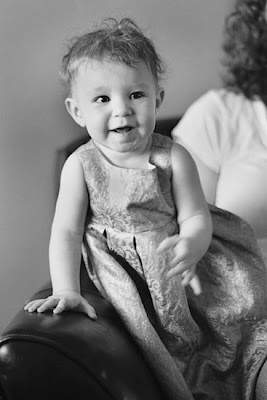
One of the great virtues of my old Pentax Spotmatic is that it has virtually no shutter lag. So, there is a much better chance of capturing fleeting expressions with the slr than with my point-and-shoot digital camera.

Although the camera used here was bought forty years ago, the lens is a slightly newer f1.8/55 Super Multi-Coated Takumar. It does a very nice job, even in low light and at the widest aperture.

Saturday, December 12, 2009

Friday morning at the Zoo


A cold winter morning turned out to be a nice time to visit the Rio Grande Zoo. The place was very quiet and we saw several keepers taking some time to visit with their charges. The cougars purred and rubbed against the bars of their enclosure. The black jaguar rolled on his back in the sand like a house cat.

The camera was an Olympus Stylus Epic Zoom. I can't really claim it to be a vintage camera; it is a compact auto-everything point-and-shoot. It does shoot film, however, and it cost me just a couple bucks at a thrift store.

Friday, December 11, 2009

tessera


Zeiss introduced the Tessar lens design by Paul Rudolph in 1902. I have examples on cameras dating from the early days to the middle of the Twentieth Century, and all perform marvelously. Zeiss early on licensed the design to other lens makers. When the patent ran out most other major camera manufacturers produced copies including Voigtländer which called its version the Color Skopar.


The name Zeiss chose for the original design is derived from the Greek word for "four", referring to the four-element, three group configuration. There are both front focus and unit focus versions, and the post-war lenses have contrast-enhancing coatings.

Thursday, December 10, 2009

'50s Style


Albuquerque entrepreneurs are still trying to cash in on Route 66 nostalgia, but the authentic mid-century motels are quickly vanishing. The lonely survivors are mostly at the east and west ends of the town, including these two on Central Avenue close to the Rio Grande.

The pictures were made with one of my Vito II by Voigtländer, also dating from the 1950s.

Wednesday, December 09, 2009

Monday, December 07, 2009

Books


Between books and cameras, all the shelf space in my little house is accounted for. So, I don't need any more of either. Well, maybe just one more of each; this time of year there are certainly a lot of tempting offerings.

I stopped briefly at Barnes and Noble this morning, and found A Century of Cameras from the Collection of the International Museum of Photography at George Eastman House by Eaton S.Lothrop. I think the author is a curator at Eastman House, and the photography was very nice. I'm usually too cheap to buy books new like this, so passed it up. When I got home, however, I found an old paperback edition used on line for only eight bucks, so couldn't resist getting it. I'll post a review once I have it in hand.

* * *

Also tempting was Nick Brandt's A Shadow Falls.
Brandt's b&w photos of African Wildlife are astonishing, all the more so as he makes them with a medium-format film camera with a normal lens. The photographer talked a bit about his technique in a photo.net posting a couple years ago in response to some typically idiotic forum blather:

nick Brandt , Feb 23, 2006; 12:00 a.m.
A friend told me about this thread. Reading through it, I felt compelled to address some of the questions and many innacuracies!

Firstly, 90% of my photos are taken from the safety of a vehicle. Only the chimps and one special herd of giraffes are photographed on foot. Neither I nor anyone else could ever get this close to wild animals any other way. Forget about safety - most of the animals would run away (and a few would attack).

Secondly, the depth of field issue. I'll say it categorically - NONE of the depth of field thing is done in Photoshop - it is all done in camera. You could not get those focal planes shifting in focus in the same plane in the way that they do in Photoshop and expect it to look like this. Don Satalic is soooo wrong. Oh, and I don't use soft focus lenses. Don't even know what they are. The longest lens I own and use is a 200mm. Great lens. Tried the 300 once and hated it. Too conventional. So yes, I am close, but safe.

All anyone really needs to know is that I work in a very very impractical way - very manually - and lose a crazy number of potentially great shots with all the faffing around I do. But I do it because occasionally something great comes out of such impractical methods. My friend Rocky Schenck taught me not to reveal my trade secrets some time ago. As for my EX-SF dealer's comments, I don't know where that came from.

Grading - I nearly always use a heavy ND grad for the sky, and often a red filter, to get the sky dark. But there is significant grading done in Photoshop - the vignetting is invariably photoshop - I'm a sucker for it.

Okay, so if anyone is still reading this thread, there you go.

PS What is a 'bokeh'?

Amazon's discounted price of $31.50 is really a steal, so I'm not sure I'll wait to find this one on the remainder tables. Meanwhile, you can also look at the images on Brandt's web site.  There is also an extensive treatment of Brandt's work at the artsy.net web gallery.

* * *

When my art-collecting brother-in-law visited recently, he brought along a copy of Looking In: Robert Frank's The Americans, Expanded Edition.

I've probably seen all the photos in the book at one time or another, but the historical context provided in this big new edition really seems worthwhile.

I think there were only about eighty photos in the first edition of The Americans, selected from thousands shot with his Leica as Frank crisscrossed the U.S. in the 1950s. That herculean selection process was clearly as significant to the original book's production as the photographic endeavor. A good overview of Frank and his work appeared in an article by Philip Gefter just a year ago in the New York Times.

Saturday, December 05, 2009

street artist


This street artist was blowing Christmas ornaments on a Friday night in Albuquerque's Old Town. There was a good turnout for the annual lighting of the Christmas tree in spite of chilly temperatures. I felt sorry for the traditional Mexican dancers who were wearing thin cotton costumes.

The Plaza's dim lighting didn't do much to create a festive atmosphere, and I was pleased to come away with one snap I liked. The Argoflex Forty's brilliant finder is nice for night shooting. I pushed the Tmax a couple stops in developing.

Thursday, December 03, 2009

120 to 620

There are a lot of fine old cameras, mostly made by Kodak, that were designed to use the now-defunct 620 rollfilm format. Many of those cameras can be used today with still-available 120 film. Sometimes, the ends of the film spool will need to be trimmed down to get it to fit in the film compartment of the camera. I was content to use that method until I acquired some cameras such as the superlative Kodak Duo Six-20 which has a film compartment that is just too small to admit even a trimmed down 120 spool. With an otherwise unusable fine camera as motivation, I was able to overcome my own resistance to rerolling 120 onto 620 reels.

To get started you will need a fresh roll of 120 film, two old metal 620 reels which are just a little smaller than the modern plastic 120 reels, and a dark film changing bag which is normally used for daylight loading of film into sheet-film holders or developing cannisters.


Peel off the paper retaining strip from the film roll and insert the tapered end of the backing paper squarely into the longest slot in the first 620 reel. Roll enough of the backing paper onto the reel so that it will all stay in place when you lay it down inside the dark bag. Now, place everything including the second empty 620 reel inside the bag, zip it up and put your hands in through the elastic-cuffed sleeves of the bag. Everything from here on is done in total darkness.


Take up the slack and start rolling the backing paper further on to the 620 reel. Maintain some tension with your fingers on both reels so that the film winds on smoothly but do not use excessive force which could damage the film emulsion. If you feel uncertain about the process, it would be worthwhile to sacrifice a roll of film to practice the procedure in daylight once to get the feel of it.


After you have rolled about a foot of the backing paper onto the 620 reel you will come to the beginning of the actual film with is attached to the backing paper with a strip of tape. Just keep right on, smoothly rolling the backing paper and attached film onto the 620 reel.


When you get to the end you will have another retaining strip hanging off the end of the backing paper which is normally used to secure the roll after you have removed it from the camera. I generally just leave that alone, though you could tear it off at that point and just use a rubber band to secure the roll if necessary until it is processed.


Set aside the plastic 120 reel, pick up the second empty 620 reel and thread the tapered end of the backing paper into the long slot as before. You should be able to distinguish the long slot from the short one by running your fingertip along the shaft of the reel. Be sure the paper is squarely centered in the reel and start winding again while maintaining some tension.


You will soon come to the end of the film which is free and not taped to the backing paper as is the other end. You may not immediately detect the film end, but you will feel the stiff and slick surface as distinct from the backing paper. You will need to tuck the free end of the film under the rolled backing paper, and then continuing rolling on, maintaining appropriate tension.


About a foot from finishing, you will again encounter the end of the film that is taped onto the backing paper. At this point, some people recommend carefully peeling off the tape and repositioning it to remove any buckling of the film that has been created by the rolling process. I have not found that to be necessary, possibly because the use of two 620 spools in the process seems to avoid the buckling problem.


Continue rolling on the film and backing to the end and you have your roll of film ready for loading into your 620 camera. If you need to store the film, put a rubber band around the roll to keep it secured, and store it in a dark container. If you are going to have someone else process your film, be sure to tell them that you need to get your 620 reel back with the negatives.


I continued for a time to use trimmed 120 reels in my cameras which would permit that. However, the rerolled film on 620 reels tends to advance much more smoothly in any of the cameras designed for the format, and I now use only the rerolling method.